Landscaping
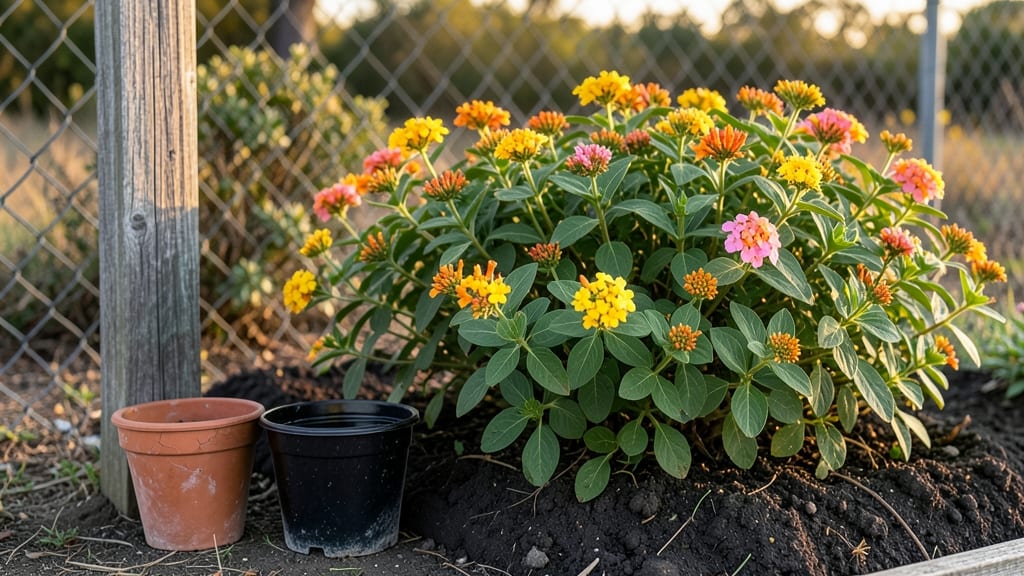
Transforming fence posts into flower pots turns plain borders into vertical garden magic—my first project started with a single old boot and a handful of succulents, and now I can't imagine a yard without them.
The best part? You don’t need fancy materials or expensive plants to make it work. Repurposed containers, thrifted pots, or even painted wooden boxes can create a rustic charm that blends seamlessly with any garden style.
Start with durable, weather-resistant materials—terracotta, plastic, or metal pots hold up best, while wooden crates or galvanized buckets add that signature rustic flair. Plant spacing is key: smaller pots (6-12 inches) work for herbs or annuals, while larger ones (18+ inches) can handle shrubs or small trees.
Drainage holes are non-negotiable, so drill them if your pots don’t have them—trust me, soggy roots ruin the fun.
By summer, your fence line will burst with color and texture, from trailing nasturtiums to spiky yucca, while seasonal swaps keep things fresh. The payoff? A garden that feels intentional, not just decorative—plus, you’ll save space and create a living border that doubles as a pollinator paradise.
Ready to turn your fence into a green gallery?
Works for everything from cottage gardens to modern minimalist spaces, and the best part is you can start small—one post, one pot, one happy plant at a time. Let’s get growing!
📚 In This Guide
- What you need
- Instructions
- Tips and common mistakes
- Wrapping up and next steps
What you need
- ● Fence posts: 3–5 old wooden or metal fence posts (4x4 or 6x6 inches, weathered or painted for rustic charm). Pro tip: 💡 Salvage from a local demolition or hardware store!
- ● Drill: Cordless or corded (1/4"–3/8" drill bit included).
- ● Screws: 2–3" exterior-grade deck screws (galvanized or stainless steel, ~10–15 screws total).
- ● Sandpaper: Medium-grit (80–120) to smooth rough edges.
- ○ Paint/stain (optional): Exterior-grade paint or wood stain (choose colors that complement your garden!).
- ● Drainage holes: 1/2" hole saw or drill bit (for bottom drainage).
- ● Potting soil: High-quality, well-draining mix (1–2 bags, ~2–3 cubic feet total).
- ● Plants: Compact, trailing, or bushy varieties like petunias, fuchsias, succulents, or herbs (3–5 plants per post).
- ○ Mulch (optional): Wood chips or gravel to retain moisture and add texture.
- ● Safety gear: Work gloves, safety goggles.
- ● Level: To ensure posts hang straight.
- ● Measuring tape: For precise spacing (6–12" apart between posts).
- ○ String/line: To mark even heights (optional but helpful!).
- ● Watering can: With a long spout for easy watering.
Step-by-step instructions for creating fence post flower pots
Transform old fence posts into charming vertical gardens with this easy upcycling project.
Gather and Prepare Your Fence Posts
Start by selecting 4-6 wooden fence posts—standard 4x4 posts work perfectly. Look for posts that are at least 3 feet tall and free of rot or significant damage. Sand down any rough edges or splinters using 80-grit sandpaper, then wipe away dust with a damp cloth. This ensures your hands stay safe and the finished pots look polished. I like to stain or paint the posts at this stage if I want a cohesive look—just let them dry completely before planting.
Next, drill drainage holes near the bottom of each post using a ½-inch drill bit. Space them about 1 inch apart in a circle to allow excess water to escape. This prevents root rot and keeps your plants healthy. Place a small piece of landscape fabric over the holes to keep soil from washing out while still letting water drain freely. Here's the thing—if you skip this step, you'll end up with soggy soil and unhappy plants.
Fill the Posts With Soil and Planting Mix
Fill each post ¾ full with a well-draining potting mix. I blend ½ part potting soil, ¼ part perlite, and ¼ part compost to ensure good drainage while retaining enough moisture for roots. Pack the mix gently but firmly—you want it snug enough to hold plants but loose enough for roots to spread. Leave about 1 inch of space at the top to accommodate watering and plant growth. Tap the post lightly on the ground to settle the soil evenly.
For the first layer of plants, choose shallow-rooted varieties like snapdragons, petunias, or succulents. These thrive in the limited space and add instant color. Plant them 1-2 inches deep, pressing the soil gently around the roots to secure them. Water lightly after planting to help the soil settle and encourage root contact. If you're using seedlings, handle them carefully—they're delicate at this stage.
Arrange and Secure the Posts for a Vertical Display
Decide on your vertical layout—whether you want a curved, zigzag, or straight line design. For a rustic look, I like to space the posts 6-12 inches apart and secure them to a horizontal fence rail or trellis using zip ties or sturdy wire. If you're attaching them to a wooden fence, pre-drill holes to avoid splitting the wood. For a more casual vibe, lean the posts against a decorative trellis or lattice panel and let them stand on their own.
Once secured, add a second layer of plants on top of the first. This time, opt for trailing plants like nasturtiums, sweet potatoes, or ivy—they’ll spill over the edges and create a lush, cascading effect. Plant these 1 inch deeper than the first layer to give their roots room to anchor. Water the entire arrangement thoroughly, letting the water run through the posts to flush out any air pockets in the soil. This ensures your plants start with a strong foundation.
Maintain Your Vertical Garden
Water your fence post pots deeply 2-3 times per week, depending on your climate. Stick your finger 1 inch into the soil—if it feels dry, it’s time to water. Avoid overhead watering, which can cause soil to erode out of the drainage holes. Instead, use a watering can with a long spout or a gentle hose attachment to direct water to the base. Mulch the top of the soil with ½ inch of shredded bark or straw to retain moisture and suppress weeds.
Fertilize every 4-6 weeks with a balanced, water-soluble fertilizer diluted to half strength. This gives your plants a gentle nutrient boost without overwhelming them. Watch for yellowing leaves or leggy growth—these are signs your plants need more light or nutrients. If you notice pests like aphids or spider mites, spray the plants with neem oil or insecticidal soap for a natural solution. Regular pruning keeps your garden tidy and encourages bushier growth.
Tips & tricks for perfect fence post flower pots
These simple yet game-changing tips will help you create stunning vertical gardens that wow every time.
Post Selection Matters: When choosing fence posts, look for ones that are at least 3 feet tall but not so tall they become unwieldy. The 4x4 standard size works perfectly because it provides enough space for roots while being sturdy enough to hold soil and plants. If your posts have any cracks or deep grooves, fill them with wood filler before staining or painting to create a smooth surface for planting.
Drainage is Non-Negotiable: The ½-inch drainage holes you drill near the bottom are absolutely critical. Space them about 1 inch apart in a circle to ensure water can escape from all sides. This prevents root rot and keeps your plants thriving. I always place a small piece of landscape fabric over the holes before adding soil—it keeps soil from washing out while still allowing water to drain freely.
Soil Mix is Key: That ¾-full fill of well-draining potting mix is where the magic happens. The blend of ½ part potting soil, ¼ part perlite, and ¼ part compost creates the perfect balance—enough moisture retention for roots while preventing waterlogging. Don't skip the perlite! It prevents compaction that can suffocate roots in the limited space of your fence posts.
Planting Strategy: The two-layer planting technique is what creates that lush, cascading look. Start with shallow-rooted plants like snapdragons in the first layer (1-2 inches deep), then add trailing varieties like nasturtiums in the second layer (1 inch deeper). This vertical arrangement maximizes your limited space while creating visual interest. Water lightly after planting each layer to help the soil settle around delicate roots.
Pro Tips for Fence Post Flower Pots
- These simple yet game-changing tips will help you create stunning vertical gardens that wow every time.
- Post Selection Matters: When choosing fence posts, look for ones that are at least 3 feet tall but not so tall they become unwieldy.
- Drainage is Non-Negotiable: The ½-inch drainage holes you drill near the bottom are absolutely critical.
Frequently asked questions
Got questions about transforming fence posts into stunning flower pots?
You’re not alone! Here are some of the most common queries—and their practical answers—to help you get started with confidence.
What’s the best way to prepare old fence posts for planting?
Clean the posts thoroughly with soapy water to remove dirt and debris. Sand rough edges or splinters for safety, then let them dry completely. If the wood is untreated, seal the interior with a non-toxic liner (like pond liner) to prevent root rot and retain moisture. Pro tip: Drill drainage holes at the bottom to avoid waterlogging!
How long do fence post flower pots last before needing replacement?
With proper care, treated or cedar fence posts can last 3–5 years or longer. Untreated wood may degrade faster (1–3 years), especially in wet climates. Extend their life by sealing the exterior with outdoor wood stain or paint every 1–2 years. Rotate plants annually to reduce wear on the same spots.
Can I use fence post pots for vegetables or herbs instead of flowers?
Fence post pots work great for compact veggies like cherry tomatoes, peppers, or herbs (basil, thyme, parsley). Just ensure the post is large enough for root growth—aim for a diameter of at least 4–6 inches. Use lightweight potting mix and fertilize regularly since nutrients deplete faster in small containers.
What if my fence post pot starts leaking or rotting?
Leaks? Check for cracks or gaps in the liner—patch them with waterproof sealant or extra liner. Rotting? It’s likely due to excess moisture. Improve drainage by adding gravel or perlite to the soil mix, and avoid overwatering. If rot spreads, replace the post sooner rather than later to prevent mold or pests.
Are there creative ways to decorate fence post flower pots?
Paint the exterior with weather-resistant chalk paint, wrap burlap for a rustic look, or tie on macramé hangers for trailing plants. Add glazed pots inside for a polished touch, or embed pebbles and moss for a Zen garden vibe. Get creative—these pots are blank canvases for your garden’s personality!
Wrapping up and next steps
Transforming old fence posts into charming flower pots is more than just upcycling—it’s a creative way to breathe new life into your outdoor space while adding rustic flair.
Whether you’re a gardening novice or a seasoned pro, these DIY pots are a fun, budget-friendly project that yields stunning vertical garden magic. 🌿✨
Now that you’re armed with tips, tricks, and answers to common questions, it’s time to grab those fence posts and get crafting! Start small with a single pot, or go all out and create a whole vertical garden display. Your garden—and your neighbors—will thank you for the cozy, handmade touch.