Companion Plants
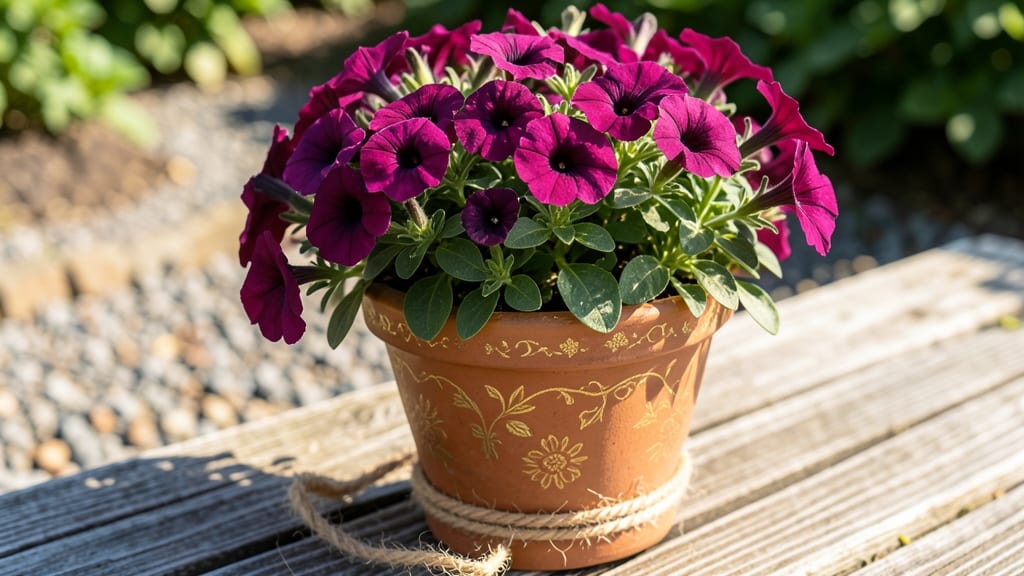
Flowering outdoor pot plants can turn any patio or balcony into a vibrant, ever-changing gallery—no yard required. 🌸 I’ve designed containers that bloom from spring through fall, using petunias, geraniums, and fuchsias to create layers of color that shift with the seasons.
The key isn’t just picking pretty flowers; it’s matching their needs to the pot, sunlight, and your watering routine.
Start with containers that have drainage holes—terracotta for rustic charm or lightweight plastic for easy moving. Group plants by sunlight needs: sun-lovers like geraniums in bright spots, while impatiens thrive in partial shade.
Add a slow-release fertilizer at planting time for a three-month boost, and mulch the top to keep roots cool and moisture locked in.
By mid-summer, your pots will be overflowing with blooms in every hue—deep purples, fiery oranges, and soft pinks cascading over edges. The best part? You can swap out plants seasonally: cool-weather pansies in spring, heat-tolerant zinnias in summer, and ornamental kale for winter interest. Each container becomes a living canvas.
This approach works for small balconies or large patios, and even urban rooftops. The only rule? Play with heights—tall snapdragons in back, trailing sweet potato vine spilling over the sides—and let your personality guide the colors. Ready to create your own container masterpiece?
📚 In This Guide
- What you need
- Instructions
- Tips and common mistakes
- Wrapping up and next steps
What you need
- ● Flowering pot plants: Choose 3-5 varieties (e.g., petunias, geraniums, or impatiens) for layered color. Select plants with similar sunlight and water needs.
- ● Containers: 1-2 large pots (12-18 inches in diameter) with drainage holes. Terracotta, ceramic, or fiberglass work well.
- ● Potting soil: 1-2 bags of high-quality, well-draining container mix (avoid garden soil—it compacts!). Look for blends labeled for flowering plants.
- ● Drainage material: Small pebbles, gravel, or broken pottery (1-2 inches thick) to prevent root rot.
- ● Slow-release fertilizer: 1 packet of balanced granular fertilizer (10-10-10 or 20-20-20) or organic options like composted manure.
- ● Watering can or hose with a gentle spray nozzle: For even moisture without disturbing plants.
- ● Pruning shears: Small, sharp pair for trimming dead blooms or overgrown foliage.
- ● Mulch: Shredded bark or coconut coir to retain moisture and suppress weeds.
- ● Decorative stones or moss: For a polished, finished look around the base of pots.
- ● Plant supports: Small stakes or cages for tall varieties like snapdragons or salvias.
- ● Liquid fertilizer: For a mid-season boost (follow package instructions).
- ● Self-watering pot: If you travel often or have a busy schedule.
Step-by-step instructions for designing stunning flowering container gardens
Here's how I create vibrant, long-blooming container displays that attract pollinators and wow neighbors.
🪴 Step 1: Select the Right Containers and Drainage System
Choose containers with drainage holes—no exceptions. I prefer terra cotta pots for their breathability, but plastic works too if you drill extra holes. For 4 plants, you'll need at least two 12-inch pots or one 18-inch planter. Place shards of broken pottery over drainage holes to prevent soil loss while allowing water escape.
Size matters: Thin-stemmed annuals like petunias thrive in 8-inch pots, while bushier perennials like geraniums need 12-inch containers. Group pots of similar size together for visual harmony. I always test-fit plants before buying containers—nothing worse than realizing your favorite trailing plant won't have enough room to cascade.
🌿 Step 2: Layer Soil and Plants for Height and Texture
Fill each pot 1/3 full with lightweight potting mix (never garden soil—it compacts). For 4 plants, you'll need about 2 gallons per container. I like to add a slow-release fertilizer (like 10-10-10) mixed into the bottom layer—this feeds roots steadily without burning tender new growth.
Start with tallest plants in the center. For example, place salvia or snapdragons at the back, then medium-height like geraniums, and finally trailing plants (like nasturtiums) at the edges. Press each plant's root ball into the soil, then fill gaps with more potting mix. Leave 1 inch below the rim—this prevents soil spillage when watering.
☀️ Step 3: Water Thoroughly and Position for Optimal Light
Water each container deeply until water flows from the drainage holes. This ensures roots establish properly from the start. I use a watering can with a narrow spout to direct moisture to the soil without disturbing plants. After watering, let pots sit for 10 minutes—this helps settle the soil around roots.
Most flowering container plants need 6-8 hours of direct sun. Place pots where they'll get morning sun (to prevent afternoon wilting) or dappled shade if your climate runs hot. Rotate pots quarter-turn weekly so plants grow evenly—you'll see stems lean toward light if you skip this. I always test locations for a full day before planting to avoid surprises.
💧 Step 4: Maintain Moisture and Fertility for Continuous Blooms
Water when the top inch of soil feels dry—stick your finger in to check. Containers dry out faster than garden beds, so I water every 2-3 days in summer or daily during heatwaves. Avoid wetting leaves when watering—this invites fungal diseases like powdery mildew. Instead, water at the base in the morning so foliage dries quickly.
Feed plants every 2 weeks with a balanced liquid fertilizer (like 20-20-20). I mix it at half-strength to prevent root burn. Deadhead spent blooms weekly—this encourages more flowers and keeps plants looking tidy. For 4 plants, you'll need about 1 quart of fertilizer solution per feeding. Watch for yellowing leaves—this usually means overwatering or nutrient deficiency.
✂️ Step 5: Prune and Refresh for Season-Long Color
Trim back overgrown stems by 1/3 in early summer to promote bushier growth. Use clean, sharp pruners and cut just above a leaf node. I always sterilize tools with rubbing alcohol between cuts to prevent disease spread. For trailing plants, gently tuck overgrown stems back into the pot—they'll root and create fuller cascades.
Replace wilted or diseased foliage immediately. If a plant stops blooming, it might need more sun or fertilizer. I rotate containers monthly to even out sun exposure. By late summer, add a slow-release fertilizer to the soil surface—this gives plants a nutrient boost for fall blooms. With these steps, your containers will stay vibrant well into autumn.
Tips & tricks for perfect flowering container gardens
Here's what I've learned after years of creating showstopping container displays that keep blooming all season.
Container Material Matters: Terra cotta pots breathe better than plastic, helping prevent root rot in those 12-inch containers. But here's the thing: plastic holds moisture longer, which is better for drought-prone areas. I always test my location first—if it's hot and dry, plastic keeps roots happier. For terra cotta, water more frequently during heatwaves to prevent cracking from drying out too quickly.
Soil Layering Secret: That 1/3 full initial layer of potting mix isn't just about space—it's about creating proper drainage. I add a handful of perlite or coarse sand to the bottom third to prevent compaction. For the 2 gallons needed per container, mix in 1/4 cup of worm castings with your slow-release fertilizer—this gives plants an instant nutrient boost while preventing root burn from concentrated fertilizer.
Light Positioning Pro Tip: The 6-8 hours of direct sun requirement is non-negotiable, but timing matters just as much. Morning sun is gentler than afternoon heat, which can scorch leaves. I place containers where they get morning sun but afternoon shade—this prevents the "sunburn" look on leaves while still giving plants enough light to bloom. If your only option is full sun, rotate containers quarter-turn weekly to prevent lopsided growth.
Watering Wisdom: That 10-minute settling time after watering is crucial for root establishment. I use a moisture meter to check soil moisture—when it reads dry at the top inch, that's when I water. For containers with trailing plants, water from the top but avoid wetting the leaves of trailing varieties like nasturtiums, which are prone to powdery mildew. I've found that watering at the base with a narrow spout canister prevents this entirely.
Pro Tips for Flowering Outdoor Pot Plants
- Here's what I've learned after years of creating showstopping container displays that keep blooming all season.
- Container Material Matters: Terra cotta pots breathe better than plastic, helping prevent root rot in those 12-inch containers.
- Soil Layering Secret: That 1/3 full initial layer of potting mix isn't just about space—it's about creating proper drainage.
Frequently asked questions
Got questions about keeping your outdoor pot plants blooming beautifully? Here are some of the most common concerns—and their solutions! Whether you're a newbie or a seasoned gardener, these answers will help you grow with confidence.
What’s the best time of year to plant flowering outdoor pot plants?
For most flowering plants, spring (after the last frost) or early fall (6-8 weeks before the first frost) are ideal. This gives roots time to establish before extreme heat or cold. Pro tip: If planting in summer, choose heat-tolerant varieties like petunias or geraniums and water deeply to reduce shock.
How often should I water flowering pot plants?
Water when the top 1-2 inches of soil feel dry—usually every 2-3 days in hot weather, but adjust for rain or shade. Pots dry out faster than ground soil, so morning watering is best to prevent fungal issues. Troubleshoot: Yellowing leaves often mean overwatering; wilting means thirst!
Can I reuse the same potting mix for multiple seasons?
Not ideal! Over time, soil depletes nutrients and compacts. Refresh with half new potting mix and a slow-release fertilizer in spring. For heavy feeders like impatiens or begonias, swap out 25% of the soil annually. Bonus: Add compost for natural nutrients!
What are the most common pests for flowering pot plants, and how do I stop them?
Watch for aphids, spider mites, and slugs. Spray infestations with soapy water or neem oil, and use copper barriers for slugs. Prevent pests: Space plants for airflow, remove debris, and attract ladybugs with companion plants like marigolds.
What’s a great low-maintenance flowering pot plant for beginners?
Try petunias, geraniums, or snapdragons—they’re drought-tolerant, bloom prolifically, and thrive in full sun. For shade lovers, impatiens or fuchsias are forgiving and vibrant. Tip: Deadhead spent blooms to encourage more flowers!
How do I overwinter flowering pot plants?
Move tender plants indoors near a sunny window or into a garage (keep temps above 40°F). Reduce watering and fertilize lightly. Hardy perennials like coneflowers can stay outside with mulch. Pro move: Prune back by 1/3 before winter to save energy.
Wrapping up and next steps
Transforming your outdoor space with flowering outdoor pot plants is easier—and more rewarding—than you think! By choosing the right companions, layering colors, and providing proper care, you can create vibrant, low-maintenance displays that bloom season after season.
Whether you’re a seasoned gardener or just starting, these tips will help you thrive with confidence.
Ready to bring your vision to life? Start small:
- Pick one container and plant combo to test.
- Experiment with colors and textures—don’t be afraid to mix it up!
- Share your progress (or blooms!) with fellow plant lovers for extra motivation.