Size
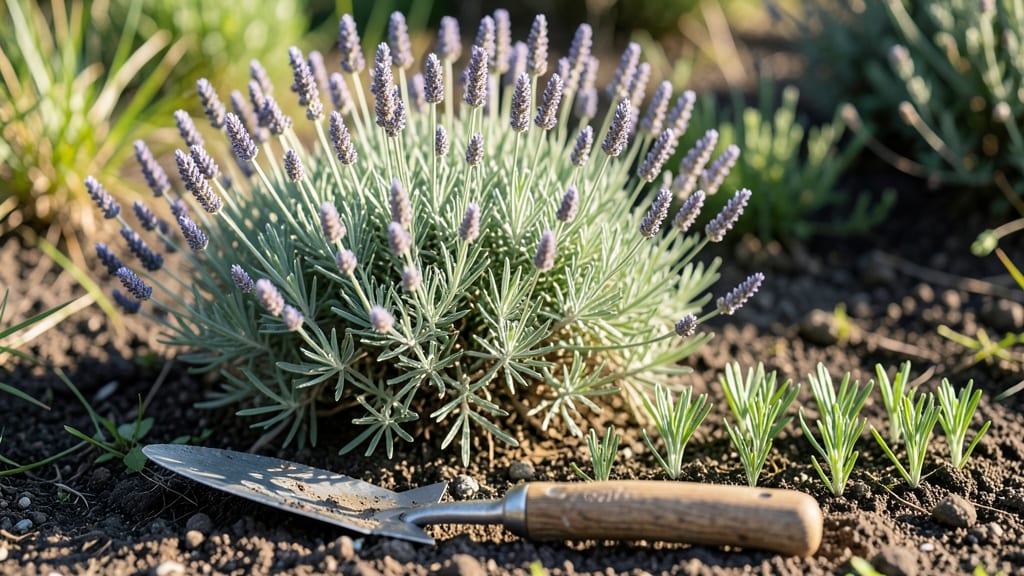
Creating a flower bed that blooms from spring through fall starts with the right design layers—how to grow a flower bed isn’t just about planting flowers, it’s about crafting a living tapestry that changes with each season.
I remember my first attempt: I bought a flat of marigolds and stuck them in the ground, only to have them flop by July. The difference now? A three-tiered approach that keeps color vibrant, textures varied, and maintenance manageable.
You’ll need a sunny spot with at least 6 hours of light, a shovel, compost, mulch, and plants that play well together—think tall backrow perennials like coneflowers, mid-height annuals like salvia, and low-spreading bulbs or creeping thyme for the front.
The soil mix should be loose and amended with compost; I swear by a 50-50 blend of native soil and compost to give roots room to breathe. This setup ensures your bed stays lush even through droughts.
What you’ll end up with is a garden that feels like a professional display but requires no green thumb—just consistent watering, an inch of mulch to retain moisture, and a quick trim of dead blooms.
Picture it: June’s peonies giving way to July’s black-eyed Susans, then September’s asters holding court until frost. The key is choosing plants with staggered bloom times so something’s always in flower.
This method works for any size bed, from a 3-foot-wide strip along a walkway to a 10-foot circular island in the backyard. The same principles apply whether you’re working with perennials that return year after year or annuals that deliver instant color.
Let’s turn that blank space into a showstopper—one layer at a time.
📚 In This Guide
- What you need
- Instructions
- Tips and common mistakes
- Wrapping up and next steps
What you need
- ● Soil: 2–4 cubic yards of high-quality topsoil or a mix of topsoil and compost (ratio: 2 parts soil to 1 part compost).
- ● Mulch: 2–3 bags of organic mulch (e.g., shredded bark, pine straw, or cocoa hulls) to retain moisture and suppress weeds.
- ● Plants: Tall Backdrop (Height: 3–5 ft): 3–5 perennials or shrubs (e.g., Coneflower, Black-Eyed Susan, or Butterfly Bush).
- ● Mid-Layer (Height: 1.5–3 ft): 5–7 shrubs or perennials (e.g., Daylilies, Salvia, or Russian Sage).
- ● Front Layer (Height: 6 in–1.5 ft): 9–12 low-growing plants (e.g., Pansies, Creeping Thyme, or Ajuga).
- ● Annuals (for seasonal pops): 3–5 packs of Petunias, Marigolds, or Impatiens (if desired).
- ● Fertilizer: Slow-release granular fertilizer (10-10-10 or organic options like fish emulsion).
- ● Tools: Garden spade or shovel
- ● Garden fork (for aerating soil)
- ● Hand trowel
- ● Pruners (for trimming)
- ● Rake (for leveling soil)
- ● Wheelbarrow (for hauling materials)
- ● Measuring tape or string (to mark layout)
- ● Edging material (e.g., landscape fabric, bricks, or metal edging) to define borders.
- ● Garden gloves (to protect your hands 🙌).
- ● Hose with a spray nozzle (for gentle watering).
- ● Soil pH test kit (to check if amendments like lime or sulfur are needed).
- ● Decorative stones or pebbles (for a polished finish).
- ● A sunlight assessment of your space (note hours of direct/indirect sun per day).
- ● Access to a water source (or a portable watering solution).
- ● Basic knowledge of your USDA Hardiness Zone (check here to pick climate-appropriate plants).
- ● Patience! Layered beds take 3–6 months to fully mature and bloom.
Step-by-step instructions for designing a layered flower bed
Here's how I create a vibrant, low-maintenance flower bed that blooms from spring through fall.
Plan Your Flower Bed Layers
Start by sketching your bed's dimensions and dividing it into three distinct layers: the back layer (tall plants), mid layer (medium-height plants), and front layer (short plants). I always place taller perennials and shrubs at the back to create a natural backdrop, with mid-height annuals or perennials in the middle, and low-growing ground covers or short perennials at the front. This ensures every plant gets sunlight without shading its neighbors.
Consider bloom times too—pair early spring bloomers like tulips with summer favorites like coneflowers and late-season asters. I like to include at least one evergreen (like heuchera or sedum) to maintain year-round interest. For a 4-foot-wide bed, I typically allocate 12-18 inches for the back layer, 12 inches for the middle, and 6-12 inches for the front.
Prepare the Soil for Healthy Growth
Remove any existing grass or weeds, digging down 6-8 inches to loosen the soil. Amend the soil with 2-3 inches of compost and a balanced fertilizer (10-10-10) to provide essential nutrients. I always test my soil first—if it's too sandy, I add peat moss for better moisture retention; if it's clay-heavy, I mix in perlite to improve drainage. Work the amendments into the soil until it feels light and crumbly, like a well-aerated cake batter.
For a 4-foot-wide bed, you'll need about 2 cubic feet of compost and 1 pound of fertilizer. Water the amended soil thoroughly before planting to help it settle and eliminate air pockets. Let it sit for 24 hours before adding plants—this gives roots a head start in moist, nutrient-rich soil.
Plant Tallest Elements First
Begin by planting the tallest elements at the back of the bed. For a 4-foot-wide bed, I typically place 3-5 shrubs or perennials (like delphiniums, hollyhocks, or ornamental grasses) spaced 12-18 inches apart. Dig holes twice as wide as the root ball but only as deep as the container—planting too deep can suffocate roots. Gently remove the plant from its container, loosen the roots if they're circling, and place it in the hole.
Fill the hole with soil, pressing lightly to remove air pockets, and water deeply to settle the roots. I always add a 1-inch layer of mulch around the base (but not touching the stem) to retain moisture and suppress weeds. For the back layer, I use wood chips or shredded bark—they break down slowly and add organic matter over time.
Add Mid-Height and Front-Layer Plants
Next, fill the middle layer with medium-height plants like daylilies, black-eyed Susans, or salvia, spacing them 8-12 inches apart. These plants should be placed 6-12 inches in front of the back layer to create depth. Dig holes just as deep as the root ball and water each plant thoroughly after planting. For a 4-foot-wide bed, you'll need about 8-10 mid-height plants to fill the space without overcrowding.
Finally, add low-growing plants like ajuga, creeping thyme, or short perennials like coreopsis to the front layer. These should be spaced 6-8 inches apart and placed 4-6 inches in front of the mid-height plants. Water the entire bed deeply after planting to encourage root establishment. I like to use straw mulch for the front layer—it breaks down quickly, adding nutrients as it decomposes.
Maintain for Season-Long Blooms
Water deeply 2-3 times per week for the first month, then adjust based on rainfall—aim to keep the soil 1-2 inches deep consistently moist but not soggy. I check moisture by sticking my finger into the soil; if it feels dry at that depth, it's time to water. Fertilize lightly in early spring and mid-summer with a slow-release granular fertilizer to encourage continuous blooming.
Deadhead spent flowers regularly to encourage more blooms and prevent self-seeding weeds from taking over. I also prune leggy or overgrown plants in early spring to maintain shape and promote bushier growth. For perennials, divide clumps every 3-4 years to keep them vigorous and prevent overcrowding.
Tips & tricks for perfect layered flower beds
Creating a stunning flower bed with seasonal color takes thoughtful planning—and these insider tips will help you avoid common pitfalls while elevating your design.
Layering Secret: When planning your 4-foot-wide bed, I always start by sketching a simple diagram with the back layer (12-18 inches deep), middle layer (12 inches), and front layer (6-12 inches). This visual helps me visualize how each plant will contribute to the overall height and texture. Pro tip: Place your tallest plants at the very back—this creates that professional "wow" factor where every plant gets its moment in the sun without getting shaded out.
Soil Prep Game-Changer: That 24-hour waiting period after amending your soil isn't just a suggestion—it's critical. The soil needs time to settle and for the nutrients to integrate properly. I like to use a soil probe to check moisture at 1-2 inches deep after watering. If it feels dry, give it another drink before planting. For clay-heavy soils, mix in perlite to improve drainage—this prevents waterlogging that can drown roots.
Plant Spacing Precision: The spacing measurements in Steps 3 and 4 aren't arbitrary—they're based on mature plant sizes. For example, those 12-18 inch spacings for back layer plants account for how delphiniums or hollyhocks will spread over time. If you're using smaller varieties, you can reduce spacing by 2-3 inches, but never less—crowding leads to competition for nutrients and air circulation issues that invite pests.
Evergreen Strategy: That one evergreen you're including (like heuchera or sedum) isn't just for winter interest—it's your structural anchor. I always plant mine slightly off-center in the back layer to create visual balance. Choose varieties with interesting foliage colors to add texture contrast throughout the year. This is what keeps your bed looking vibrant even when other plants are dormant.
Pro Tips for Grow A Flower Bed
- Creating a stunning flower bed with seasonal color takes thoughtful planning—and these insider tips will help you avo...
- Layering Secret: When planning your 4-foot-wide bed, I always start by sketching a simple diagram with the back layer...
- Soil Prep Game-Changer: That 24-hour waiting period after amending your soil isn't just a suggestion—it's critical. T...
Frequently asked questions
Got questions about creating your dream flower bed? Here are some of the most common ones—plus straightforward answers to help you grow with confidence!
What’s the best time of year to start a flower bed?
The ideal time depends on your climate, but spring (after the last frost) or early fall (6-8 weeks before first frost) are the sweet spots. These windows give plants enough time to establish roots before extreme weather. In warmer zones, winter planting can also work—just choose cold-hardy varieties!
How often should I water a new flower bed?
Newly planted beds need deep watering 2-3 times per week (about 1 inch total). Once established (after 4-6 weeks), reduce to 1 inch per week, adjusting for rain. Mulch helps retain moisture—just avoid piling it against plant stems to prevent rot.
What do I do if pests or weeds take over?
Start with prevention: healthy soil and mulch deter many pests. For weeds, hand-pull young ones or use a vinegar-based spray (mix 1 gallon vinegar + 1 cup dish soap). For pests like aphids, blast them off with water or introduce beneficial insects like ladybugs. Never use chemical pesticides near edible plants!
Can I mix perennials and annuals in the same bed?
Perennials (like coneflowers or hostas) provide structure and return yearly, while annuals (like marigolds or petunias) add seasonal pops of color. Place perennials at the back/center and annuals in front for a layered, ever-changing look. Just match their sunlight and water needs!
Are there budget-friendly alternatives to expensive mulch?
Yes! Try grass clippings, shredded leaves, straw, or even cardboard (lay flat, wet it down, then cover with soil). Pine cones, wood chips, or even free local mulch from tree-trimming services work too. Just avoid thick layers of grass clippings—they can mat down and suffocate plants.
How do I protect my flower bed in winter?
Most perennials handle winter fine, but tender plants need help. Mulch heavily (3-4 inches) with straw or leaves, and wrap delicate plants in burlap. In extreme cold, cover containers with bubble wrap or frost blankets. Avoid heavy snow buildup—gently brush it off to prevent stem damage.
Wrapping up and next steps
Growing a stunning, season-long flower bed is all about planning, layering, and patience—but the results are worth every effort! 🌸 By choosing the right plants, preparing your soil, and maintaining consistency, you’ll create a vibrant oasis that blooms from spring to frost.
Remember, even small steps—like mulching or deadheading—make a big difference over time.
Now that you’re armed with the know-how, take the first step today! Start small with a single bed or sketch your dream design—then roll up your sleeves and let nature do the rest. Happy gardening! 🌱✨