Flowers
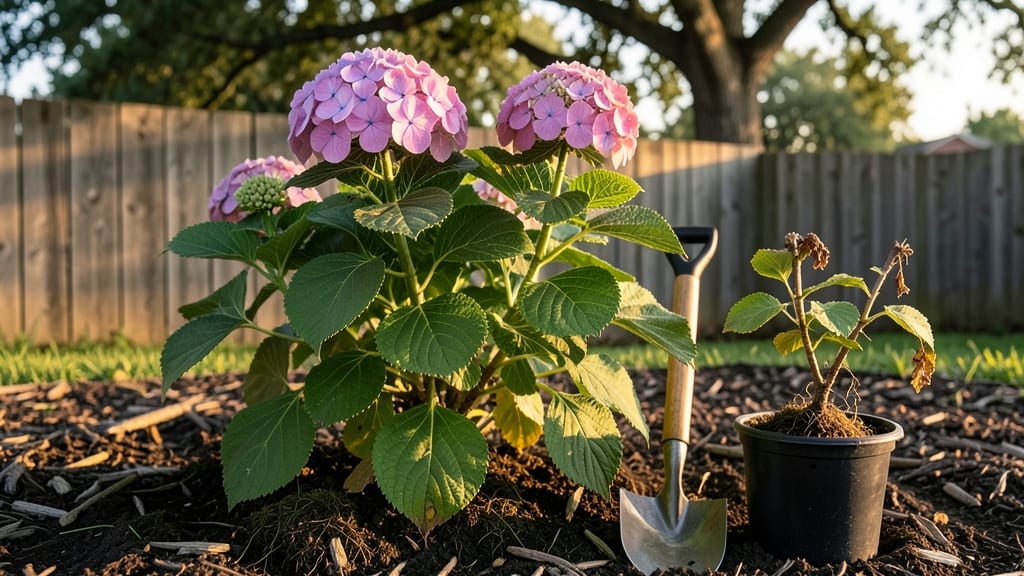
Planting hydrangea flowers in the Pacific Northwest means choosing varieties that thrive in our damp, cool summers and chilly winters—like the frost-resistant Endless Summer or Nikko Blue that bloom reliably year after year. 🌿 I’ve learned the hard way that the right spot and soil prep make all the difference between a bush bursting with blooms and one that struggles to survive.
The secret isn’t just digging a hole—it’s about mimicking their natural woodland habitat right in your yard.
Start with well-draining soil mixed with compost, and pick a location with morning sun and afternoon shade—hydrangeas hate scorching heat. Bare-root plants need their roots soaked overnight before planting, while container-grown ones can go straight in.
Space them 4-6 feet apart so they have room to grow without competing, and plant the root crown just above soil level to prevent rot. Water deeply right after planting, then keep the soil consistently moist but not soggy for the first few weeks.
What you’ll end up with is a lush, vibrant shrub that becomes the star of your garden by summer. The blooms start as tight buds in early spring, unfurling into jewel-toned clusters that last from June through frost.
Prune in late winter or early spring to shape the plant and encourage next year’s flowers—just avoid cutting back old wood if you want those classic big blooms.
This method works for both new gardeners and seasoned growers, though experienced hands can experiment with soil amendments like sulfur to adjust bloom color. The key is patience—hydrangeas take a year or two to really establish, but once they do, they reward you with decades of effortless beauty.
Let’s get those roots in the ground!
📚 In This Guide
- What you need
- Instructions
- Tips and common mistakes
- Wrapping up and next steps
What you need
- ● Hydrangea plants: Choose frost-resistant varieties like Hydrangea macrophylla or Hydrangea arborescens (e.g., 'Annabelle' or 'Endless Summer'). Buy 3–5 plants for a fuller look.
- ● High-quality potting soil: 1–2 bags (50 lbs each) of well-draining, acidic soil (pH 5.5–6.2). Mix in 1 part perlite or sand per 3 parts soil for drainage.
- ● Organic mulch: 2–3 inches of pine bark, wood chips, or shredded leaves to retain moisture and regulate temperature.
- ● Fertilizer: Slow-release granular fertilizer: 1 lb (e.g., 10-10-10 or hydrangea-specific blend).
- ○ Optional: Alum or sulfur (for blue blooms) or lime (for pink blooms).
- ● Garden tools: Trowel or spade
- ● Pruning shears (sterilized!)
- ● Gloves (to protect from thorns)
- ● Watering can or hose with a gentle spray nozzle
- ● Sunlight: Partial shade (4–6 hours of morning sun) is ideal for most PNW hydrangeas. Avoid harsh afternoon sun.
- ○ Water source: Ensure consistent moisture (hydrangeas hate drought!). A drip irrigation system is optional but helpful.
- ● Planting location: Choose a spot with protection from strong winds (e.g., near a fence or building).
- ● Timing: Plant in early spring or fall (avoid extreme heat or frost).
- ● 🌡️ Test your soil! PNW soil can be alkaline—use a soil pH test kit ($10–$15) to adjust for optimal blooms.
- ● ✨ Group plants for a stunning hydrangea "specimen" display. Space 3–5 feet apart.
- ● 🔥 Deadhead spent blooms in late summer to encourage next year’s flowers.
Step-by-Step instructions for planting hydrangeas in the Pacific Northwest
Here’s how to set your frost-resistant hydrangeas up for lush, vibrant blooms that thrive in our cool, damp climate.
🌱 Step 1: Choose the Right Location and Soil Conditions
Hydrangeas love partial shade—think 4-6 hours of morning sun and afternoon dappled light. In the Pacific Northwest, this means avoiding harsh afternoon sun, which can scorch leaves. Test your spot: if the ground stays damp for long stretches (as it often does here), hydrangeas will adore it.
Dig a hole twice as wide as the root ball but only as deep—planting too deep suffocates roots. Amend the native soil with 2-3 inches of compost mixed into the bottom of the hole. Hydrangeas prefer slightly acidic to neutral soil (pH 5.5-6.5). If your soil leans alkaline (common in our region), add sulfur or peat moss to adjust pH before planting.
☀️ Step 2: Plant at the Correct Depth and Water Thoroughly
Remove the hydrangea from its container and loosen roots if they’re circling. Place it in the hole so the top of the root ball sits level with the surrounding soil—never bury the stem. Backfill with native soil mixed with compost, tamping gently to eliminate air pockets. Water deeply until moisture seeps 6 inches down, ensuring roots make contact with damp soil.
Mulch with 3 inches of wood chips or shredded bark, keeping mulch 6 inches away from the stem to prevent rot. This mimics the forest floor hydrangeas evolved in and protects roots from temperature swings. In our rainy climate, mulch also prevents soil compaction from foot traffic.
💧 Step 3: Establish a Watering Routine for First-Year Growth
Water 2-3 times per week during the first growing season, aiming for 1-2 gallons per plant. Check moisture by sticking your finger 2 inches deep—if it’s dry, water again. Hydrangeas in the Pacific Northwest often face root rot from overwatering, so prioritize deep, infrequent watering over light daily sprinkles.
After the first year, hydrangeas develop deeper roots and need less frequent watering. By their second summer, they’ll tolerate our natural rainfall with only supplemental watering during dry spells. Fertilize lightly in early spring with balanced 10-10-10—hydrangeas here don’t need heavy feeding, just a gentle nudge to bloom.
✂️ Step 4: Prune for Pacific Northwest Climate and Bloom Type
Wait until late winter or early spring (after the last frost but before new growth) to prune. If you have mophead or bigleaf hydrangeas, cut back last year’s stems by ⅓ to encourage larger blooms. For panicle or smooth hydrangeas, prune old wood in late winter and shape new growth in summer—these varieties bloom on new wood and tolerate our cool summers better.
Remove dead, crossing, or weak stems first. Never prune more than ⅓ of the plant at once—hydrangeas here need all their energy to establish roots before flowering. After pruning, apply a 2-inch layer of mulch to retain moisture and regulate soil temperature.
🌿 Step 5: Monitor for Pacific Northwest-Specific Pests and Adjust Care
Watch for hydrangea sawfly larvae (tiny green caterpillars) or aphids, which thrive in our damp climate. Spray with neem oil at the first sign—it’s organic and effective. Yellowing leaves often signal overwatering or nutrient deficiency; adjust by letting the top inch of soil dry between waterings and adding iron chelate if leaves pale.
In fall, cut back wilted blooms but leave stems intact—they protect buds over winter. Hydrangeas here are remarkably frost-hardy, but a thick layer of mulch (4-6 inches) acts as insulation against our occasional hard freezes. By spring, you’ll see vigorous new growth—proof your hydrangeas have adapted to our unique climate.
Tips & tricks for perfect hydrangea planting in the Pacific Northwest
Here's what I've learned after years of growing thriving hydrangeas in our region's unique climate—these tricks will help you avoid common pitfalls and get the most stunning blooms possible.
Location is Everything: When selecting your spot, remember that hydrangeas in the Pacific Northwest actually prefer the morning sun more than afternoon light. The 4-6 hours of morning sun gives them energy without the risk of afternoon leaf scorch that our climate can bring. I've seen dramatic differences in bloom quality when plants get too much hot afternoon sun—leaves turn crispy and blooms suffer. Test your site by observing how long it stays damp; hydrangeas love that moisture retention.
Root Ball Placement Matters: The most critical planting detail is getting that root ball depth perfect. I've made the mistake of planting too deep, which suffocates the roots, and too shallow, which exposes them to temperature swings. Always aim to have the top of the root ball sit level with the surrounding soil—this ensures the plant can establish strong roots without stress. After planting, gently tamp down the soil to eliminate air pockets that could prevent proper root contact with the soil.
Mulching Strategy for Our Climate: The 3-inch layer of mulch we use in Step 2 is non-negotiable for Pacific Northwest hydrangeas. It's not just about moisture retention—it's about protecting those roots from our dramatic temperature swings between day and night. I've found that keeping mulch 6 inches away from the stem prevents rot while still providing the insulation hydrangeas need. In our rainy climate, mulch also prevents soil compaction from foot traffic, which can be a real issue in garden beds.
Watering Wisdom: The 2-3 times per week watering schedule in Step 3 might seem like a lot, but it's crucial for first-year establishment. I've learned the hard way that hydrangeas here are particularly prone to root rot from overwatering, so deep, infrequent watering is key. Always check moisture by sticking your finger 2 inches deep—this is the real test, not just looking at the surface. After the first year, you'll notice your plants develop deeper roots and become much more drought-tolerant.
Pro Tips for Planting Hydrangea Flowers
- Here's what I've learned after years of growing thriving hydrangeas in our region's unique climate—these tricks will ...
- Location is Everything: When selecting your spot, remember that hydrangeas in the Pacific Northwest actually prefer t...
- Root Ball Placement Matters: The most critical planting detail is getting that root ball depth perfect. I've made the...
Frequently asked questions
Got questions about planting hydrangeas in the Pacific Northwest? You’re not alone! Here are some of the most common concerns—plus clear, actionable answers to help you grow stunning, frost-resistant blooms.
When is the best time to plant hydrangeas in the PNW?
The ideal window is early spring (March–April) or early fall (September–October). Spring planting gives roots time to establish before summer heat, while fall planting avoids winter stress. Avoid planting in extreme heat or frost—hydrangeas hate both!
Can hydrangeas survive PNW winters?
Most hydrangea varieties (like Hydrangea macrophylla or Hydrangea arborescens) are hardy to USDA Zones 5–9. Mulch heavily (3–4 inches) around the base in late fall to insulate roots. Just avoid pruning in late winter—wait until early spring to avoid damaging dormant buds.
How often should I water newly planted hydrangeas?
Water deeply 2–3 times per week for the first month, keeping soil moist but not soggy. Once established (after 6–12 months), hydrangeas are drought-tolerant but still need 1 inch of water weekly. Morning watering prevents fungal issues—PNW’s humidity is no joke!
What if my hydrangea leaves turn yellow or wilt?
Yellowing leaves often signal overwatering or poor drainage. Check soil moisture and ensure your planting spot has well-draining soil (amend with compost if needed). Wilting could also mean underwatering or root-bound roots—loosen compacted soil gently. Need more help?
Can I plant hydrangeas in containers instead of the ground?
Yes! Use a large container (15+ gallons) with drainage holes and a mix of potting soil + perlite. Opt for compact varieties like ‘Endless Summer’ or ‘Limelight.’ Move pots to a sheltered spot in winter if temps drop below 10°F. Just remember: container plants dry out faster—water more frequently!
Still stumped? Drop your question in the comments—we’re happy to help you grow hydrangea magic!
Wrapping up and next steps
Planting hydrangeas in the Pacific Northwest is a rewarding way to bring vibrant color to your garden—even in cooler climates! 🌸 With the right soil, sunlight, and frost-resistant varieties like Hydrangea macrophylla or Hydrangea arborescens, you’re well on your way to stunning blooms year after year.
Just remember to prune at the right time, mulch for winter protection, and keep an eye on moisture levels.
Now that you’re armed with tips and tricks, roll up your sleeves and get planting! Grab your gloves, pick a sunny spot, and watch your garden transform into a lush, hydrangea-filled paradise. Happy gardening! 🌱