Lawn
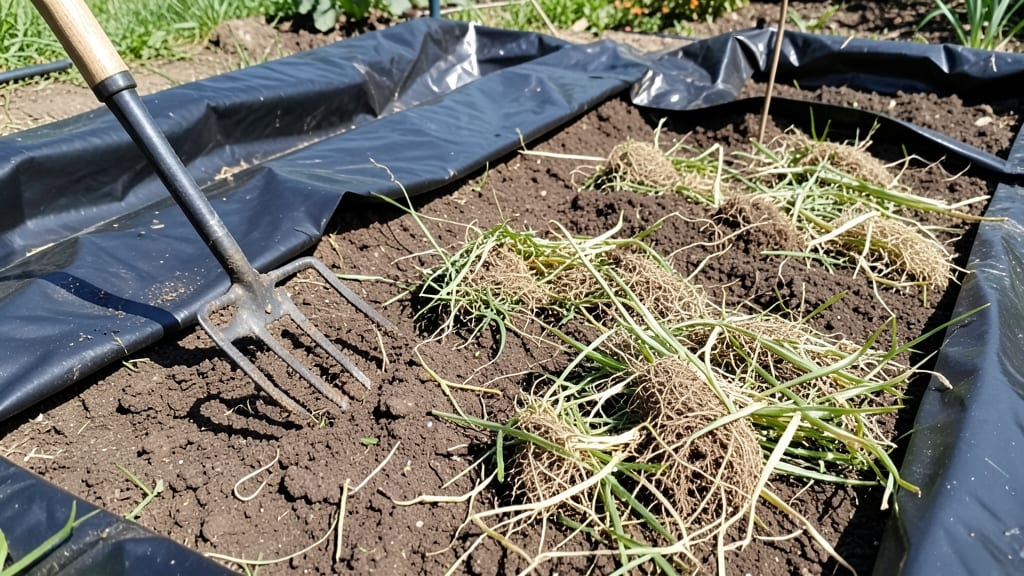
Removing grass from a flower bed doesn’t have to mean wrestling with roots and messy clumps—there’s a cleaner way. I’ve transformed stubborn lawn patches into lush flower beds using precision edging techniques that keep regrowth under control, and I’ll show you how.
The key is choosing the right method for your space: whether you smother, till, or use targeted herbicides, each approach has its own advantages.
Most people grab a shovel and dig, only to end up with a weedy mess within weeks. Instead, I recommend starting with a clear boundary—use a sharp spade to slice through the grass roots along your desired edge.
For larger areas, smothering with thick cardboard or landscape fabric blocks sunlight and weakens the grass over 4-6 weeks without chemicals. If you’re impatient, a rototiller breaks up roots quickly, but it’s messier and stirs up weeds.
Once the grass is gone, you’ll have rich, exposed soil ready for flowers—but don’t rush planting. Loosen the top 6 inches with a fork to aerate, then mix in 2-3 inches of compost for nutrients.
This step makes all the difference between flowers that thrive and ones that struggle. The best part? With proper edging and a thick layer of mulch, you’ll keep grass from creeping back for years.
Even the cleanest method has hiccups—like stubborn Bermuda grass or uneven edges—but I’ll walk you through fixes for those too. Whether you’re working with a small border or a whole backyard, these steps turn a frustrating chore into a neat, productive flower bed that impresses every time you walk by.
📚 In This Guide
- What you need
- Instructions
- Tips and common mistakes
- Wrapping up and next steps
What you need
- ● Garden edging tool (e.g., half-moon edger, serrated knife, or oscillating tool) – for precision cuts
- ● Shovel or spade (flat-edged, 8-12" wide) – for digging and removing grass roots
- ● Garden rake (bendable-tine or bow rake) – for clearing debris and loosening soil
- ● Garden twine or string (10-20 ft, depending on bed size) – for marking edges
- ● Measuring tape (25 ft) – for accurate layout
- ● Work gloves (heavy-duty, grip-enhanced) – for protection and comfort
- ● Knee pads or cushion – for long sessions
- ● Wheelbarrow or large bucket (5+ gallons) – for hauling grass clippings
- ○ Garden hose with nozzle – for rinsing tools and wetting soil (optional but helpful)
- ○ Vinegar or non-selective herbicide (1 gallon or spray bottle) – for killing grass regrowth (optional but recommended)
- ● Edging material (plastic, metal, or landscape fabric) – to prevent grass regrowth
- ● Post-hole digger – for securing edging stakes
- ● Pruners or hedge shears – for trimming overgrown grass or weeds
- ● Soil amendment (compost or mulch) – for enriching the new flower bed
- ● Safety goggles – for dusty or debris-heavy projects
Step-by-step instructions for precision grass removal in flower beds
Transforming grassy patches into clean, defined flower beds starts with methodical removal. Here's how I ensure crisp edges and zero regrowth.
Mark and Outline Your Flower Bed
Use a garden hose or spray paint to trace the exact dimensions of your flower bed. I prefer a 12-18 inch wide bed for most perennials—this width allows for easy maintenance while maximizing plant placement. Press the hose or paint line firmly into the soil to create a visible guide. This step prevents guesswork later and ensures your edges stay sharp.
Check for underground utilities before digging deeper than 4 inches. Call 811 if you're unsure—hitting a buried line turns a simple project into a disaster. I also sketch a rough layout on paper first, adjusting for sun exposure and plant groupings. This saves time and prevents costly mistakes when you realize the bed is too narrow for your design.
Apply a Grass Killer to the Target Area
Choose a non-selective herbicide like glyphosate for complete grass elimination. Mix the solution according to label instructions and apply it evenly to the grassy area using a pump sprayer. Avoid overspraying onto desired plants or nearby lawn—this can cause damage. I like to work on dry, calm days to prevent drift and ensure full coverage.
Wait 7-10 days until the grass turns brown and crispy. You'll know it's ready when you can easily pull up clumps with minimal resistance. If any green patches remain, spot-treat those areas. Never rush this step—partial kill leads to stubborn regrowth that ruins your clean lines.
Remove Dead Grass and Loosen Soil
Use a flat-headed shovel or edging tool to slice through the dead grass along your marked line. Work in 4-inch increments, cutting vertically to create a clean edge. Discard the grass debris—composting it risks spreading weeds. I dig down 6-8 inches to remove grass roots completely, which prevents future sprouts.
Loosen the remaining soil with a garden fork or tiller. Break up compacted layers to improve drainage and root penetration for your new plants. Sift through the soil to remove any remaining grass clumps or rocks. This step ensures your flower bed starts with a clean, workable foundation.
Install Edging for Long-Term Definition
Install metal or plastic landscape edging along your marked line to maintain crisp borders. Drive the edging 2-3 inches deep into the soil using a mallet. For curved beds, bend the edging with pliers before installing. I prefer flexible metal edging because it conforms to any shape without gaps.
Fill the bed with 3-4 inches of compost mixed into the topsoil. This improves fertility and structure. Press the soil lightly to settle it, then water thoroughly to encourage root growth. The edging will keep soil—and weeds—in place while allowing water to penetrate freely.
Plant and Mulch for a Finished Look
Choose plants suited to your climate and sun exposure, spacing them according to their mature size. I recommend starting with perennials for low-maintenance beds, as they return year after year. Water deeply after planting to help roots establish.
Apply 2-3 inches of mulch over the soil surface, keeping it 2 inches away from plant stems to prevent rot. Use wood chips or shredded bark for a natural look that suppresses weeds and retains moisture. This final layer completes your flower bed, giving it a polished, professional appearance.
Tips & tricks for precision grass removal in flower beds
These game-changing strategies will help you achieve professional-looking flower beds without the common pitfalls that leave grass regrowing or edges looking sloppy.
Marking Strategy: For Step 1, use a bright-colored spray paint instead of a hose for your outline—it creates a more visible, permanent guide that won't fade or shift during the process. I also recommend marking your bed dimensions on paper first, then transferring them to the ground. This prevents costly mistakes when you realize the bed is too narrow for your design after you've already started digging. Measure twice, mark once!
Grass Killer Application: In Step 2, focus on complete coverage but avoid overspray. I've found that using a pump sprayer with a fine mist nozzle gives better control than a broadcast pattern. Apply the grass killer on a dry, windless day to prevent drift onto surrounding plants. The 7-10 day wait period is crucial—don't be tempted to rush this step. Partial kill leads to stubborn regrowth that ruins your clean lines.
Root Removal Technique: When you reach Step 3, that 6-8 inch depth for root removal isn't just about looks—it's about preventing future sprouts. Use a flat-headed shovel to slice through the dead grass along your marked line in 4-inch increments. This method creates clean edges while ensuring you remove all grass roots. Discard the grass debris rather than composting it to prevent spreading weeds.
Edging Installation: For Step 4, driving the edging 2-3 inches deep is essential for maintaining those crisp borders. I recommend using flexible metal edging for curved beds—it conforms perfectly without gaps. After installing, fill the bed with 3-4 inches of compost mixed into the topsoil. This improves fertility while creating a clean, workable foundation for your new plants.
Pro Tips for Remove Grass For A Flower Bed
- These game-changing strategies will help you achieve professional-looking flower beds without the common pitfalls tha...
- Marking Strategy: For Step 1, use a bright-colored spray paint instead of a hose for your outline—it creates a more v...
- Grass Killer Application: In Step 2, focus on complete coverage but avoid overspray. I've found that using a pump spr...
Frequently asked questions
Got questions about transforming your grassy patch into a stunning flower bed? Here are answers to common concerns to help you tackle the task with confidence!
When is the best time to remove grass for a flower bed?
The ideal time is early spring or late fall—when grass is actively growing but before extreme heat or frost. Avoid summer, as dry conditions can stress plants and make removal harder. If you must do it in summer, water the area first to soften the soil.
Do I need to remove all the grass roots, or can I just smother it?
For a permanent flower bed, dig out roots (at least 4–6 inches deep) to prevent regrowth. Smothering with cardboard or landscape fabric works for temporary solutions but may require maintenance. If you choose smothering, plan to replace the cover after 6–12 months for best results.
What’s the easiest way to remove grass without chemicals?
Try manual removal (digging or hand-pulling) for small areas, or use a sod cutter to slice grass into strips. For larger sections, smother with thick layers of cardboard + mulch or black plastic (left for 3–6 months). Solarization (clear plastic sheets in sunlight) is another chemical-free option.
Why does grass keep growing back after I remove it?
Grass spreads via rhizomes (horizontal roots) and stolons (runners). If you don’t dig deep enough (4–6 inches), fragments regrow. For stubborn patches, repeat the smothering process or spot-treat with vinegar (3% acetic acid) for natural suppression. Consistency is key!
Can I plant flowers right after removing grass, or should I wait?
Wait 2–4 weeks after removal to let the soil settle and any remaining grass roots decompose. Test soil pH and amend with compost for nutrients. If you used smothering methods, wait until the area is fully prepped (no green shoots) before planting.
What if my flower bed edges keep getting overrun by grass?
Prevent regrowth with edging tools (metal or plastic) to create a clean border. Apply pre-emergent herbicide in early spring or use mulch or gravel to block light. For organic control, try corn gluten meal (a natural pre-emergent) around the bed’s perimeter.
Wrapping up and next steps
Removing grass from your flower bed doesn’t have to be a messy ordeal—with the right tools and techniques, you can achieve clean, precise edges that make your garden shine! 🌸 Whether you opt for manual edging, smothering, or chemical methods, the key is patience and consistency.
Now that you’re equipped with the know-how, it’s time to roll up your sleeves and transform that patchy lawn into a vibrant, well-defined flower sanctuary.
Next step: Sketch a rough design of your flower bed, mark the edges, and start with a small section to practice your chosen method. Before you know it, you’ll be admiring your showstopping garden oasis! 🌿