Flowers
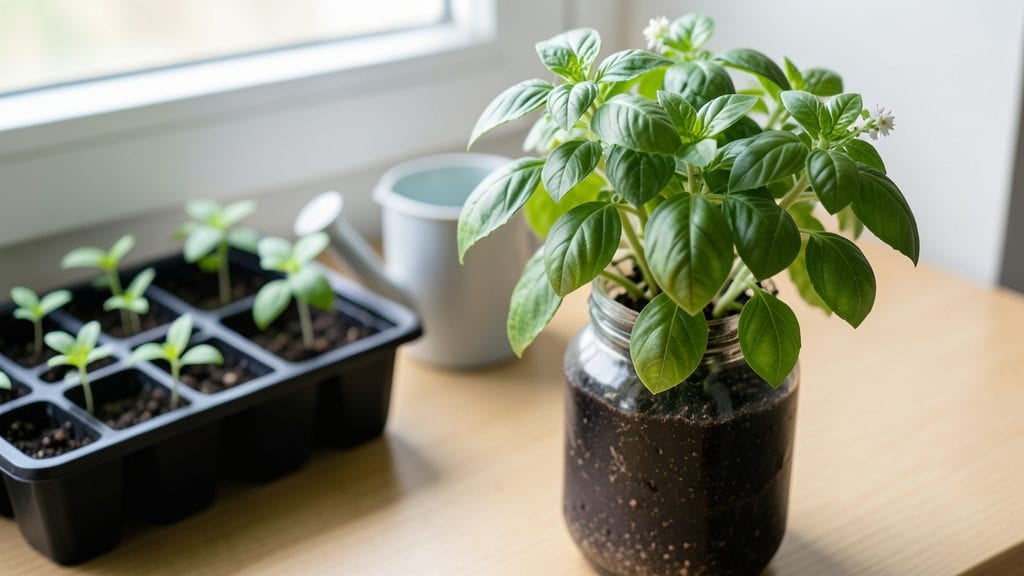
Transforming a plastic bottle into a flower pot is one of those gardening hacks that feels like magic—until you see how simple it really is. 🌱 I started doing this after realizing how many empty bottles ended up in my recycling bin, and now I grow thriving herbs and succulents in pots that cost nothing and take minutes to make.
The best part? You’re saving landfill space while creating a planter that works just as well as anything store-bought.
You’ll need just a few things: a clean plastic bottle (2-liter soda bottles work perfectly), a sharp knife or scissors, and some small pebbles for drainage. Herbs like basil or thyme, plus succulents such as sedum or echeveria, thrive in these lightweight, portable pots.
The key is cutting the bottle at the right height—about 4-6 inches from the bottom—and poking drainage holes in the cap so excess water escapes. Safety first: always supervise kids and use bottles made from food-safe plastic (look for the recycling symbol #1 or #2).
Once your bottle is prepped, fill the bottom with pebbles, add your soil mix, and plant your herbs or succulents. Place them in a sunny spot, water lightly, and watch them grow—no fancy tools or expensive pots required.
These upcycled planters are perfect for small spaces, balconies, or even as gifts. The satisfaction of growing something from a discarded bottle? That’s the real reward.
Pro tip: Rotate your bottles occasionally so the plants grow evenly, and avoid overwatering—succulents especially hate soggy roots. If you’re worried about the plastic breaking down over time, just swap it out for a new bottle when needed.
This method proves that sustainable gardening doesn’t have to be complicated—just creative and resourceful.
📚 In This Guide
- What you need
- Instructions
- Tips and common mistakes
- Wrapping up and next steps
What you need
- ● Clean plastic bottle: 1–2 large plastic bottles (1–2 liters each, like soda or water bottles). Rinse thoroughly and remove labels.
- ● Scissors or craft knife: For cutting and shaping the bottle.
- ● Permanent marker: To draw cutting lines or designs.
- ○ Drill or nail + hammer (optional but helpful): For making drainage holes (use a nail if a drill isn’t available).
- ○ Decorative supplies (optional): Acrylic paint + brushes
- ● Stickers, washi tape, or fabric scraps
- ● Twine or ribbon for hanging (if making a macramé-style pot)
- ● Potting soil: Lightweight mix for herbs or cactus/succulent soil.
- ○ Small pebbles or gravel (optional):** For drainage at the bottom (¼ cup per pot).
- ● Safety first: Adult supervision if using sharp tools like scissors or drills.
- ● Work surface: A cutting mat or old newspaper to protect your workspace.
- ● Patience & creativity! Let your imagination guide the design—no two pots need to look alike. 🌱
Step-by-step instructions for creating a plastic bottle flower pot
Here's my favorite way to turn empty plastic bottles into stylish, functional planters for herbs and succulents.
🪴 Step 1: Gather and Prepare Your Bottles
Start with clean, empty plastic bottles—any size from 16 to 32 ounces works perfectly. Rinse them thoroughly to remove any residue, then let them dry completely. I like to use soda or water bottles because their shape creates a nice, stable pot. Remove the cap entirely and discard it—you won't need it for drainage.
For extra stability, cut the bottle about 2 inches from the bottom using a sharp knife or scissors. This creates a wider base that won't topple over easily. If you're using a bottle with a narrow neck, you can also cut off the top portion to create a self-watering system later. Just remember to leave at least 4 inches of height for your plants to grow comfortably.
✂️ Step 2: Create Drainage Holes
Drainage is critical for preventing root rot, especially with succulents. Use a heated nail or a drill with a small bit to poke 4-6 evenly spaced holes around the bottom of your bottle. Space them about 1 inch apart to ensure good water flow. If you're using a larger bottle, add a few more holes—just don't go overboard, or the soil will drain too quickly.
Here's the thing—if you don't have a drill, don't stress. A heated nail works just as well. Simply heat the tip of a nail over a flame or candle until it's glowing red, then press it firmly into the plastic. The holes will be small at first, but they'll expand slightly once you add soil. Test the drainage by filling the bottle with water and letting it sit for a few minutes—water should drip out steadily but not all at once.
🌱 Step 3: Add Soil and Plant Your Herbs or Succulents
Fill the bottle about ¾ full with a lightweight cactus or succulent mix—regular potting soil will compact too much and suffocate roots. For herbs like basil or thyme, use a well-draining potting mix instead. Tap the bottle gently on the table to settle the soil, then create a small hole in the center with your finger or a pencil.
Plant your herbs or succulents carefully, pressing the soil around the base to secure them. If you're using a bottle with a narrow neck, you can create a self-watering system by leaving a 1-inch gap between the soil and the top rim. This gap acts as a reservoir for water, which will slowly seep down to the roots. For succulents, plant them close together—they love being snug! For herbs, space them out a bit more to allow for growth.
☀️ Step 4: Water and Position for Growth
Water your new plants lightly right after planting—just enough to moisten the soil without soaking it. Succulents and herbs like basil thrive in well-draining soil, so avoid overwatering. Wait until the top inch of soil feels dry before watering again. For self-watering bottles, fill the gap at the top with water and let it absorb slowly over time.
Place your upcycled pots in a spot with bright, indirect light for the first few days to help them adjust. Succulents need at least 6 hours of sunlight daily, while herbs like basil prefer 4-6 hours of morning sun. If you notice the leaves turning yellow or the soil staying soggy, move the pot to a brighter or drier location. Once your plants are established, you can experiment with different placements to see what works best.
💧 Step 5: Maintain and Enjoy Your Upcycled Planters
Check your plants weekly for signs of overwatering or underwatering. Succulents should look plump and firm, while herbs should have vibrant green leaves. If the soil feels dry to the touch, it's time to water. For self-watering bottles, top off the reservoir as needed—this method keeps roots consistently moist without the risk of overwatering.
Every few months, refresh the soil by gently removing the plant and adding a layer of fresh mix. This keeps nutrients high and prevents compaction. You can also decorate your bottles with paint, twine, or stickers to match your decor. The best part? These planters are lightweight, portable, and perfect for small spaces like balconies, windowsills, or even offices. Plus, you'll feel great knowing you've given a plastic bottle a second life!
Tips & tricks for perfect upcycled plastic bottle planters
Creating functional planters from plastic bottles is easier than you think—these little tricks will help you avoid common pitfalls and make your upcycled pots look even better.
Bottle Selection Matters: The 16-32 ounce range works perfectly for herbs and succulents, but I always recommend soda bottles—they have that extra stability thanks to their wider base. If you're using a narrow-neck bottle, remember to leave at least 4 inches of height after cutting the top portion for your self-watering system.
Drainage Test: After creating your 4-6 drainage holes (about 1 inch apart), do a quick test by filling the bottle with water and letting it sit for a few minutes. Water should drip out steadily but not all at once—this ensures proper drainage without losing soil. If it drains too fast, add a small piece of mesh or fabric over the holes as a filter.
Soil Settling Tip: When filling your bottle ¾ full with soil, tap it gently on the table to settle it properly. This prevents air pockets that could suffocate roots. For the self-watering system, leave that 1-inch gap at the top—it's the secret to consistent moisture without overwatering.
Light Positioning: Succulents need at least 6 hours of sunlight daily, while herbs like basil prefer 4-6 hours of morning sun. If you notice yellowing leaves, it's usually a sign of too much water or insufficient light. Move your planters to a sunnier spot or adjust your watering schedule accordingly.
Pro Tips for Flower Pot Plastic Bottle
- Creating functional planters from plastic bottles is easier than you think—these little tricks will help you avoid common pitfalls and make your upcycled pots look even better.
- Bottle Selection Matters: The 16-32 ounce range works perfectly for herbs and succulents, but I always recommend soda bottles—they have that extra stability thanks to their wider base.
- Drainage Test: After creating your 4-6 drainage holes (about 1 inch apart), do a quick test by filling the bottle with water and letting it sit for a few minutes.
Frequently asked questions
Got questions about turning plastic bottles into stylish, eco-friendly flower pots? Here are some common ones—and their answers!
Can I use any plastic bottle for this project?
Most clean, food-grade plastic bottles (like soda or water bottles) work great! Look for the #1 (PET) or #2 (HDPE) recycling symbols—they’re sturdy and safe for plants. Avoid thin or damaged bottles, and always rinse them thoroughly to remove residue. Pro tip: Cutting bottles with sharp scissors or a box cutter is easiest!
How long does it take to make a flower pot from a plastic bottle?
If you’re experienced, it takes about 10–20 minutes per pot! Beginners might need 30–45 minutes, especially when cutting and decorating. Plan for extra time if you’re making multiple pots or adding paint/designs. Hot tip: Pre-measure and mark your bottle beforehand to speed things up!
What’s the best way to drain water from a bottle planter?
Drill or poke 2–4 small holes near the bottom (use a heated nail or drill) for drainage. For succulents, 1–2 holes are enough; herbs may need more. Line the bottom with pebbles or broken pottery shards to prevent soil from clogging the holes. Warning: Never skip drainage—root rot is a real risk!
Can I paint or decorate my plastic bottle planter?
Use acrylic paint or spray paint designed for plastic (avoid regular spray paint—it can harm plants). Seal with a non-toxic varnish if you want extra durability. For a rustic look, try twine, fabric, or even mosaic tiles. Creative tip: Let paint dry 24 hours before planting to avoid chemical fumes!
What if my bottle planter leaks or breaks?
Leaks usually mean holes are too big or drainage is poor. Fix them by melting the edges with a lighter (adult supervision required!) or sealing with waterproof glue. If the bottle cracks, transfer your plant to a new container. Prevention tip: Avoid placing heavy pots in direct sunlight for long periods to extend their lifespan.
Wrapping up and next steps
Transforming a simple plastic bottle into a stylish, eco-friendly flower pot isn’t just creative—it’s a small but meaningful step toward sustainability! 🌱 Whether you’re growing herbs, succulents, or vibrant flowers, this upcycled planter proves that repurposing everyday items can be both practical and rewarding.
Ready to green your space? Grab a bottle, follow your newfound skills, and watch your garden thrive—one plastic bottle at a time.
Next step: Share your upcycled creations with friends or explore more DIY projects to keep reducing waste. Your garden—and the planet—will thank you! 🌎✨