Container Gardens
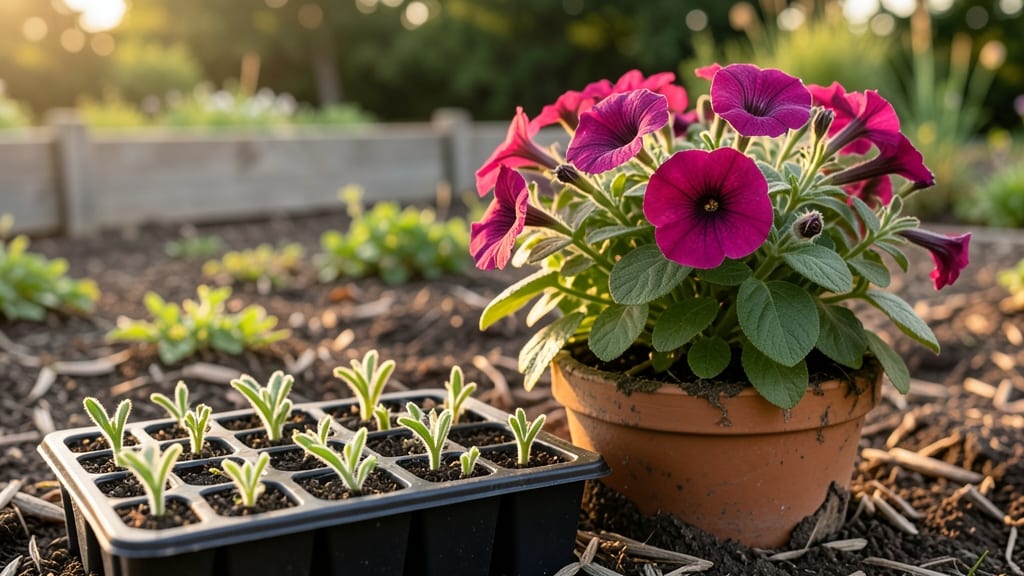
Burying flower pots in the ground is my secret weapon for keeping plants alive through winter and extending the growing season. 🌱 Last year, my potted lavender survived a 20-degree freeze because I buried it halfway—something I never would have tried without seeing it work firsthand.
The beauty of this method is how simple it is: you just sink containers into the soil, leaving the rim slightly above ground. It protects roots from temperature swings, prevents soil from drying out, and even makes transplanting easier.
My herbs and perennials now thrive 3-4 weeks longer than they used to.
You’ll notice fewer wilting leaves, stronger stems, and plants that bounce back faster from heat or cold. The buried pots also keep weeds from competing with your plants, and you can still access roots for dividing or pruning without digging up the whole bed.
Perfect for frost-prone zones, small spaces, or gardeners who want to experiment with seasonal planting. Once you try it, you’ll wonder why you didn’t do it sooner—it’s that foolproof.
📚 In This Guide
- What you need
- Instructions
- Tips and common mistakes
- Wrapping up and next steps
What you need
- ● Flower pots (3–10+ depending on your garden size): Drainage holes (essential!)
- ● Material: Terracotta, plastic, or fabric (avoid heavy ceramic for deep burial)
- ● Size: 6–12 inches in diameter (smaller for herbs, larger for perennials)
- ● Potting soil (1–3 bags, ~1 cubic foot per pot): Well-draining mix (add perlite or sand if needed)
- ● Organic matter (compost or peat moss for nutrients)
- ● Plants (choose cold-hardy or perennial varieties): Herbs (thyme, oregano), veggies (kale, carrots), or flowers (pansies, lavender)
- ● Check USDA Zone compatibility for your climate!
- ● Shovel or trowel (for digging)
- ● Garden gloves (to keep hands clean)
- ● Watering can or hose (with a gentle spray nozzle)
- ● Mulch (straw or shredded leaves to retain moisture)
- ● Slow-release fertilizer (granules mixed into soil)
- ● Plant markers (to track what’s growing where)
- ● Landscape fabric (to prevent soil mixing if burying near lawns)
- ● Burlap or mesh (for wrapping pots to blend into the ground)
Step-by-Step instructions for creating underground flower pots
Turn ordinary pots into hidden planters that protect plants from harsh weather while keeping roots cool.
🪴 Step 1: Select and Prepare Your Pots
Choose pots with drainage holes—terracotta or plastic both work well. I like to use 6-8 inch diameter pots for single flowers or 12-14 inch for shrubs. Clean them thoroughly to remove old soil or debris that could harbor diseases. If using new pots, soak them in water for 24 hours to prevent them from drawing moisture from the soil later.
Here's the thing—pots need to be sturdy enough to withstand digging. If your pot has thin plastic walls, reinforce it by wrapping the outside with burlap or chicken wire before burying. This prevents cracking when you press soil around them. I always test by gently squeezing the sides first—if it flexes too much, it won’t last underground.
🌱 Step 2: Fill Pots with Quality Soil Mix
Use a well-draining potting mix—never garden soil—because buried pots can’t handle compaction or poor drainage. I blend equal parts potting mix and perlite for extra airflow. Fill each pot to 1 inch below the rim, leaving room for your plant’s root ball. Press the soil down gently but don’t pack it tightly—roots need space to breathe.
Add a slow-release fertilizer (like 1 tablespoon per pot) mixed into the soil. This ensures your plants get steady nutrients without frequent feeding. Water the mix until it’s evenly moist but not soggy—you want it damp enough to support root growth but not waterlogged. Let excess water drain completely before planting.
☀️ Step 3: Plant and Bury the Pots
Remove your plant from its nursery pot and loosen the roots if they’re tightly bound. Place it in the prepared pot, then fill around the base with more soil until the plant sits at the same depth it was in its original container. Press lightly to eliminate air pockets, but don’t compact the soil too much.
Dig a hole in your garden bed twice as wide as the pot’s diameter and 1-2 inches deeper than the pot’s height. This gives roots room to spread without crowding. Lower the pot into the hole, then backfill with soil, pressing firmly around the edges. Leave the top 1-2 inches of the pot exposed so you can water and maintain the plant easily. I like to mound soil slightly above the pot’s rim to create a small basin for watering.
💧 Step 4: Water and Maintain for Long-Term Growth
Water the buried pot deeply right after planting to settle the soil and encourage roots to grow into the surrounding garden bed. Over the next 2-3 weeks, water every 2-3 days until the soil feels consistently moist 1 inch below the surface. Once established, your plants will need less frequent watering because the buried pot retains moisture better than surface containers.
Watch for yellowing leaves or wilting—these are signs the soil is either too dry or too soggy. Underground planters can stay damp longer, so I check by inserting a finger into the soil near the pot’s edge. If it’s dry, water; if it’s muddy, hold off. Mulch the surface around the pot with 2-3 inches of shredded bark to regulate moisture and keep roots cool in summer.
✂️ Step 5: Prune and Protect Seasonally
Trim back dead or damaged leaves throughout the growing season to encourage bushier growth. In late fall, cut back perennials to 2-3 inches above the soil line before the first frost. This protects the plant’s center from cold and makes spring regrowth easier. For tender annuals, remove them entirely and replace with cold-hardy plants like pansies or kale in early spring.
If you’re in a freezing climate, bury pots even deeper (up to the rim) and cover with 4-6 inches of mulch or a thick layer of straw. In hot regions, partially uncover the pot in summer to prevent overheating—roots can get too warm underground. I’ve seen buried pots keep plants thriving through winter in zones 5-7 with just these simple adjustments.
Tips & tricks for perfect underground flower pots
These simple tricks will help you create hidden garden planters that protect your plants while keeping them thriving all season long.
Pot Selection Tip: When choosing pots for Step 1, prioritize terracotta for its natural breathability, but plastic pots work well too if you reinforce them properly. I've found that terracotta pots actually help regulate soil temperature better in extreme heat, which is especially helpful for heat-sensitive plants like pansies or impatiens. For larger shrubs, consider using 12-14 inch diameter pots—the extra space gives roots room to establish without becoming root-bound.
Soil Mix Strategy: In Step 2, don't skip the perlite—it's the secret to preventing compaction in buried pots. I blend equal parts potting mix and perlite because this combination prevents waterlogging while still holding enough moisture for roots. For extra insurance, add a handful of coarse sand to improve drainage, especially if you're planting in heavy clay soil. The goal is to mimic the natural aeration roots would get in open ground.
Planting Depth Secret: When placing your plant in the pot during Step 3, pay attention to the soil line—it should match exactly what the plant had in its nursery container. Too deep and you'll smother the plant; too shallow and roots won't establish properly. I like to use a pencil to mark the original soil line before removing plants from their nursery pots, then reference that when repotting. This simple trick prevents one of the most common mistakes with buried planters.
Seasonal Adjustments: For Step 5's seasonal care, remember that buried pots act like natural insulation. In freezing climates, you can actually bury pots deeper than the instructions suggest—up to the rim—then cover with mulch. I've had geraniums survive winter this way in zone 5! Conversely, in hot regions, leave the top 2-3 inches exposed to prevent overheating, especially during summer heatwaves. The key is monitoring your plants' appearance rather than following rigid rules.
Pro Tips for Burying Flower Pots In The Ground
- These simple tricks will help you create hidden garden planters that protect your plants while keeping them thriving ...
- Pot Selection Tip: When choosing pots for Step 1, prioritize terracotta for its natural breathability, but plastic po...
- Soil Mix Strategy: In Step 2, don't skip the perlite—it's the secret to preventing compaction in buried pots. I blend...
Frequently asked questions
Got questions about transforming those flower pots into underground planters? You’re not alone—this creative gardening hack raises a few common ones! Here’s what we hear most often, plus quick answers to help you dig in with confidence.
Can I bury any type of flower pot in the ground?
Not all pots are created equal! Opt for terracotta, plastic, or fabric pots with drainage holes—they’ll handle moisture and root expansion best. Avoid heavy, non-breathable materials like thick ceramic or sealed plastic without holes, as they can trap water and suffocate roots. Pro tip: If your pot lacks drainage, drill holes or line it with landscape fabric to prevent soil compaction.
When is the best time to bury flower pots for planting?
Timing depends on your climate and plants. For cool-season crops (like lettuce or pansies), bury pots in early spring or fall when soil temps are mild (50–70°F). For warm-season plants (tomatoes, peppers), wait until after the last frost and soil is consistently above 60°F. In warmer zones, you can plant year-round—just monitor moisture closely!
What if my buried pot gets too hot or cold?
Underground temps can swing wildly! To regulate heat/cold:
- Insulate in winter: Wrap the pot in burlap or straw mulch to shield roots.
- Shade in summer: Place a lightweight tarp or shade cloth over the pot during peak sun.
- Choose deep pots: 12+ inches lets roots escape extreme temps near the surface.
If leaves yellow or growth stalls, it’s your cue to adjust!
Are there alternatives to burying pots if I don’t want to dig?
Try these low-effort options:
- Elevated planters: Use raised beds or half-buried troughs (like wooden crates) for partial grounding.
- Pot-in-pot method: Nest a smaller pot inside a larger one, then bury the outer pot shallowly (3–4 inches) for stability.
- Hanging or wall-mounted: Suspend pots near the ground with cascading plants (e.g., strawberries, herbs) for a similar effect without digging.
All reduce heat stress while keeping roots happy!
My buried pot’s plants look wilted—what’s wrong?
Wilting often signals overwatering, poor drainage, or root bind. Troubleshoot with this quick checklist:
Issue
Fix
Soggy soil
Check drainage holes; add perlite or sand to soil mix.
Crusty soil surface
Loosen top inch of soil and mulch with straw or pine needles.
Leggy, weak stems
Thin crowded roots or transplant to a larger pot.
If problems persist, your pot may need replacing—but most issues fix with a little TLC!
Wrapping up and next steps
Burying flower pots in the ground is a game-changer for gardeners looking to extend their growing season and boost plant health! 🌱 By repurposing containers as underground planters, you’re not just saving space—you’re creating a thriving ecosystem that protects roots from extreme temps and retains moisture.
Whether you’re a seasoned gardener or just starting out, this simple technique opens up endless possibilities for year-round blooms and lush greenery.
Ready to give it a try? Start small—pick a few pots and a sunny spot in your yard. Experiment with different plants, observe what thrives, and watch your garden transform! 🌟 Your next step: Grab your tools, dig in, and let nature do the rest. Happy planting!