Flowers
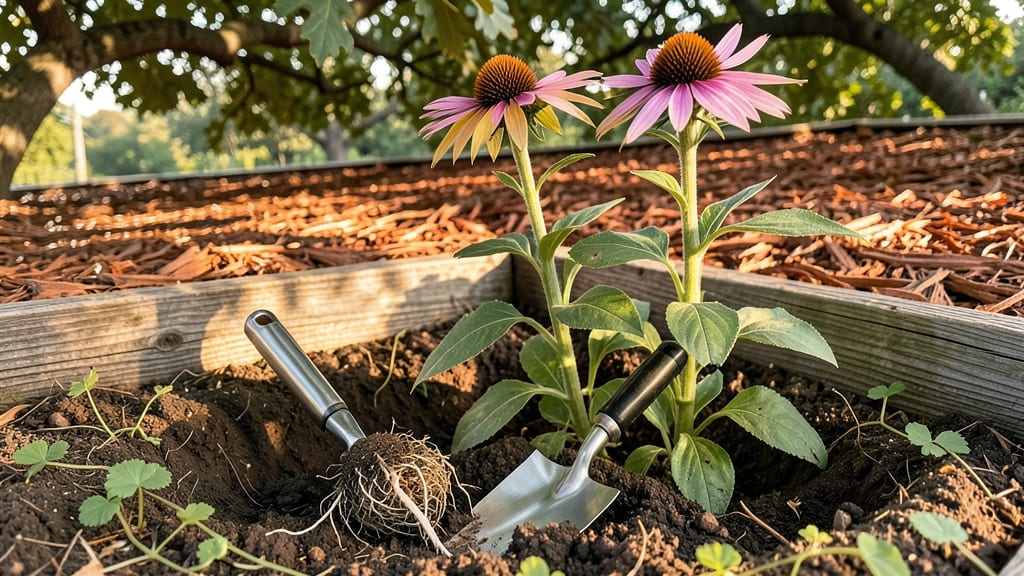
Transplanting coneflowers at the right time means longer, more vibrant blooms next season—here’s how to do it without losing a single plant. 🌻 The key is patience: rushing the process turns these hardy perennials into sad, leggy survivors instead of the bold, drought-resistant stars they should be.
Start by prepping the new spot with loose, well-draining soil mixed with compost—coneflowers hate soggy roots. Dig a hole twice as wide as the root ball but only as deep, then water it thoroughly before moving your plant.
The goal is to keep those fibrous roots moist but not drowning, so work in the early morning or late afternoon when temperatures are mild.
📚 In This Guide
- What you need
- Instructions
- Tips and common mistakes
- Wrapping up and next steps
What you need
- ● Garden trowel or transplant spade – A sharp, sturdy spade (8–12 inches long) for digging cleanly around roots.
- ● Garden fork or pruning shears – For loosening compacted soil or trimming overgrown stems.
- ● Watering can or hose with a gentle spray nozzle – To keep soil moist during the process (1–2 gallons per plant).
- ● Compost or well-aged manure – 2–3 cups per planting hole to enrich soil fertility.
- ● Mulch (straw, shredded bark, or pine needles) – 1–2 inches thick to retain moisture and suppress weeds.
- ● Garden gloves – To protect your hands from thorns and dirt.
- ● Measuring tape or ruler – To ensure proper spacing (18–24 inches apart for mature plants).
- ● Root stimulator or mycorrhizal fungi – Boosts root growth and stress recovery (follow package instructions).
- ● Slow-release fertilizer (balanced, 10-10-10) – A handful mixed into the planting hole for a nutrient kick.
- ● Plant tags or markers – To label varieties if transplanting multiple types.
- ● Shade cloth (lightweight) – Temporarily protect newly transplanted coneflowers from harsh sun for 1–2 weeks.
- ● Wheelbarrow or bucket – For hauling soil, compost, or tools between sites.
- ● ✅ Choose the right timing – Transplant on a cool, cloudy day (spring or early fall) to minimize stress.
- ● ✅ Prep the new location – Ensure it gets full sun (6+ hours/day) and has well-draining soil (amend clay soil with sand or compost).
- ● ✅ Water the original plants 1–2 days before transplanting – So roots are hydrated and easier to move.
- ● ✅ Check for pests/diseases – Inspect plants for aphids, powdery mildew, or root rot before relocating.
Step-by-Step guide to transplanting coneflowers
Here’s my foolproof method for moving coneflowers without shocking their roots—guaranteed to keep those iconic blooms thriving.
🌱 Step 1: Choose the Right Time and Prepare the New Location
Transplant coneflowers (Echinacea) in early spring or fall when temperatures are 50-65°F—never during summer heat or winter frost. The goal is to give roots 4-6 weeks to establish before extreme weather hits. Pick a spot with full sun (6+ hours daily) and well-draining soil, as coneflowers despise soggy roots. Amend heavy clay with 2-3 inches of compost mixed into the top 6 inches of soil to improve aeration.
Dig a hole twice as wide as the root ball but only as deep as the plant’s current soil line. Coneflowers hate being buried too deep—this ensures the crown stays at soil level. Water the hole thoroughly 24 hours before transplanting so the surrounding soil is moist but not waterlogged. This prevents shock when you move the plant.
✂️ Step 2: Dig Up the Coneflower Carefully
Water the coneflower deeply the day before to loosen the soil around roots. Use a sharp spade to dig a 6-inch radius around the plant, cutting straight down 2 inches beyond the root ball. Gently lift the entire clump, shaking off excess soil to expose the roots. You’ll see a woody taproot—this is normal, but avoid damaging lateral roots by handling the plant by its base, not the stems.
If the root ball is dry or brittle, soak it in a bucket of water for 10-15 minutes before transplanting. This revives roots and reduces transplant shock. Trim any dead or damaged stems at the base with sterilized pruners—this focuses the plant’s energy on root regrowth rather than supporting weak foliage.
🪴 Step 3: Transplant and Secure the Coneflower
Place the coneflower in the prepared hole, ensuring the crown sits at soil level—burying it too deep invites rot, while leaving it exposed risks stem death. Spread the roots evenly and backfill with the amended soil, pressing gently to remove air pockets. Water deeply until the soil 1 inch below the surface is saturated, then let it drain completely.
Add a 2-inch layer of mulch (like shredded bark) around the base, keeping it 3 inches away from the stem to prevent moisture buildup. This conserves water, regulates soil temperature, and suppresses weeds—critical for young roots. Avoid mulching too heavily, as coneflowers need airflow around their base to prevent fungal issues.
☀️ Step 4: Maintain Aftercare for Strong Recovery
Water the transplanted coneflower every 2-3 days for the first 2 weeks, keeping the soil evenly moist but never soggy. You’ll know it’s hydrated enough when the top 1 inch of soil feels damp to the touch. After that, water once a week unless your area experiences drought conditions—coneflowers are drought-tolerant once established, but newly transplanted plants need consistent moisture.
Fertilize 4-6 weeks after transplanting with a balanced 10-10-10 formula to support root growth. Skip high-nitrogen fertilizers—they encourage leafy growth at the expense of blooms. Watch for new growth within 3-4 weeks as a sign the plant is recovering. If leaves yellow or wilt, it’s often due to overwatering or poor drainage, so adjust your care accordingly.
⏰ Step 5: Monitor and Adjust for Long-Term Success
By late summer, your transplanted coneflower should show vigorous new stems and buds forming for next year’s blooms. If it struggles, prune back 1/3 of the foliage in early spring to encourage bushier growth. Coneflowers are perennial, so with proper care, they’ll return year after year with long-lasting daisy-like flowers that attract pollinators.
Here’s the thing—coneflowers are low-maintenance once settled, but the first year is critical. If you follow these steps, you’ll avoid the most common mistakes (like burying the crown or overwatering) and set your plant up for decades of blooms. Real talk: the key is patience. Don’t expect immediate perfection, but with consistent care, your coneflower will thrive.
Tips & tricks for perfect coneflower transplanting
A few small details can mean the difference between a thriving coneflower and one that struggles to recover. Here's what I've learned from years of transplanting these hardy perennials.
The Timing Secret: Those 4-6 weeks of establishment time in Step 1 are non-negotiable. I've transplanted in late spring when temperatures crept above 70°F, and the plants wilted within weeks. Aim for that 50-65°F range—it's the sweet spot where roots can grow without stress. If you must transplant in summer, do it during cooler morning hours and provide afternoon shade for the first week.
Root Handling Technique: When you're digging that 6-inch radius in Step 2, focus on keeping that woody taproot intact. I've seen gardeners accidentally sever it, which severely limits the plant's ability to absorb water. Gently wiggle the spade around the root ball rather than forcing it straight down—this preserves those delicate lateral roots that spread out like fingers.
Mulch Placement Matters: That 2-inch layer of mulch in Step 3 isn't just decoration—it's a lifesaver. But here's the thing: keep it 3 inches away from the stem. Too close and you'll create a moisture trap that invites fungal issues. I've seen new transplants develop crown rot because of improper mulching. Use a rake to create that proper gap after backfilling the soil.
Watering Wisdom: The instructions mention watering every 2-3 days for the first two weeks, but I've found a better approach: water deeply but less frequently. Soak the soil until it's damp 1 inch below the surface, then wait until the top inch feels dry before watering again. This encourages deeper root growth rather than shallow, weak roots that dry out quickly.
Pro Tips for Transplant Coneflowers
- A few small details can mean the difference between a thriving coneflower and one that struggles to recover. Here's w...
- The Timing Secret: Those 4-6 weeks of establishment time in Step 1 are non-negotiable. I've transplanted in late spri...
- Root Handling Technique: When you're digging that 6-inch radius in Step 2, focus on keeping that woody taproot intact...
Frequently asked questions
Got questions about transplanting coneflowers?
You’re not alone! Here are answers to the most common concerns—from timing to troubleshooting—so you can tackle your relocation with confidence.
When is the best time to transplant coneflowers?
Transplant coneflowers in early spring or early fall when temperatures are mild (50–70°F). Avoid summer heat or winter frost, as these stress plants. Spring transplants give roots time to establish before blooming season, while fall transplants allow roots to settle before dormancy.
How long does it take for coneflowers to recover after transplanting?
Most coneflowers take 4–6 weeks to fully recover, though some may bloom the same season if transplanted early. Watch for new growth—yellowing leaves or stunted stems signal stress. Keep soil moist (but not soggy) and avoid fertilizing until roots are established (about 30 days post-transplant).
Can I transplant coneflowers in full sun or shade?
Coneflowers thrive in full sun (6+ hours/day), but they’ll tolerate partial shade (3–6 hours) if your climate is hot. If moving to a shadier spot, expect fewer blooms but still hardy growth. Avoid deep shade (<3 hours of sun), which weakens plants and invites disease.
Why are my coneflowers wilting or dying after transplanting?
Wilting often signals transplant shock (root damage) or over/under-watering. Check soil moisture—it should feel like a damp sponge. If leaves turn yellow or stems rot, you’re overwatering. For droopy but firm leaves, give them 1–2 weeks to bounce back with consistent care. Mulch helps retain moisture!
What if I can’t transplant now? Can I save coneflowers for later?
Yes! Dig up clumps, trim foliage by ⅓, and store roots in a cool, dark, moist container (like a plastic bag with damp paper towels) for up to 2 weeks. Keep them chilled (35–40°F) until transplanting. For longer storage, dig in fall, cut back stems, and pot them—then replant in spring.
Wrapping up and next steps
Transplanting coneflowers doesn’t have to be stressful—with the right timing, tools, and care, you’ll give these hardy perennials the best chance to thrive in their new home. 🌸 Whether you’re dividing overcrowded clumps or relocating for better sunlight, patience and attention to detail will reward you with vibrant blooms for years to come.
Now that you’re armed with expert tips, grab your gloves and get ready to transform your garden!
💡 Next step: Mark your calendar for early fall or spring—when the soil is workable but not too hot—and start planning your coneflower relocation. Happy gardening! 🌿